

Chair mats can quietly ruin your prized hardwood floors if not managed properly. Most people miss just how much surface texture and finishing matter—and it turns out, high-gloss floors can increase sliding risk far more than you’d expect. Spotting these differences before choosing any solution is what really gives your workspace the long-term protection it needs.
Table of Contents
- Step 1: Evaluate Your Chair Mat And Flooring
- Step 2: Clean And Prepare The Hardwood Surface
- Step 3: Select And Apply Anti-Slip Solutions
- Step 4: Position The Chair Mat Correctly
- Step 5: Test The Stability Of The Mat
- Step 6: Maintain And Adjust As Necessary
Quick Summary
| Key Point | Explanation |
|---|---|
| 1. Evaluate your chair mat and floor | Assess the hardwood’s surface condition and chair mat type to ensure stability before applying solutions. |
| 2. Thoroughly clean the hardwood surface | Use appropriate cleaning methods to prepare the floor, ensuring no dust or debris hinders mat adhesion. |
| 3. Select suitable non-slip solutions | Choose anti-slip materials compatible with hardwood floors that offer effective grip without damaging surfaces. |
| 4. Accurately position the chair mat | Proper alignment of the mat enhances stability and functionality while providing comprehensive coverage. |
| 5. Maintain and inspect regularly | Conduct routine checks and cleanings to prolong mat effectiveness and adjust for environmental changes. |
Step 1: Evaluate Your Chair Mat and Flooring
Before implementing any sliding prevention strategy, a thorough evaluation of your chair mat and hardwood flooring becomes crucial. Understanding the specific characteristics of both surfaces will determine the most effective method to keep your chair mat stable and protect your valuable hardwood floors.
Start by carefully examining your hardwood floor’s surface condition and finish. Hardwood floors can vary significantly in their surface texture and protective coating, which directly impacts mat adhesion and potential sliding risks. Look for signs of wear, smoothness, or existing surface damage that might influence mat performance. Some hardwood floors have high-gloss polyurethane finishes that create extremely slick surfaces, while others might have a more textured or matte finish that provides natural grip.
Simultaneously, inspect your chair mat’s material composition and backing. Not all chair mats are created equal some are designed specifically for hardwood surfaces, while others might be more suitable for carpeted areas. Learn more about choosing the right chair mat for different floor types, which can help you understand the nuanced requirements of mat selection.
Your evaluation should consider several critical factors that influence mat stability:
- Surface smoothness of the hardwood floor
- Existing floor finish and protective coating
- Chair mat material and backing texture
- Weight distribution of office furniture
- Frequency and intensity of chair movement
Pay special attention to any micro-variations in your hardwood floor’s surface. Even slight irregularities can impact mat adhesion and sliding potential. A professional-grade measuring tool or simply running your hand across the surface can help you detect these subtle differences. The goal is to create a comprehensive understanding of your specific floor and mat environment before implementing any sliding prevention technique.
Measurement and observation are your primary tools in this evaluation process. Take time to thoroughly assess both your chair mat and hardwood flooring, as this initial step will guide all subsequent sliding prevention strategies. By understanding the unique characteristics of your floor and mat, you’ll be better equipped to select the most appropriate solution for maintaining stability and protecting your valuable hardwood surfaces.
Step 2: Clean and Prepare the Hardwood Surface
Before applying any chair mat sliding prevention technique, creating a pristine and properly prepared hardwood surface is absolutely essential. Thorough cleaning and preparation form the critical foundation for preventing unwanted mat movement, ensuring maximum grip and stability for your office chair setup.
Begin by removing all furniture and objects from the hardwood area to facilitate a comprehensive cleaning process. Use a microfibre dust mop or soft-bristled vacuum attachment designed specifically for hardwood floors to eliminate fine dust, dirt, and microscopic debris that could interfere with mat adhesion. Avoid using standard vacuum cleaner heads with stiff bristles or rotating brushes, as these can potentially scratch or damage the delicate hardwood surface.
Explore our professional commercial mat cleaning techniques to understand the importance of thorough surface preparation. After dry cleaning, proceed with a targeted cleaning solution appropriate for your specific hardwood floor finish. Mix a small amount of pH-neutral hardwood floor cleaner with warm water, ensuring the solution is only slightly damp rather than wet. Excessive moisture can damage hardwood surfaces and compromise the floor’s protective coating.
Apply the cleaning solution using a well-wrung microfibre mop or soft cloth, working in the direction of the wood grain. Pay extra attention to removing any sticky residues, scuff marks, or accumulated grime that might prevent proper mat adhesion. Allow the floor to dry completely for at least 30 minutes, using a clean, dry microfibre cloth to buff the surface and remove any remaining moisture.
Your cleaning checklist should include:
- Removing all furniture and objects from the area
- Dry cleaning with microfibre dust mop or soft vacuum attachment
- Using pH-neutral hardwood floor cleaner
- Cleaning in the direction of wood grain
- Ensuring complete and thorough drying
Verify your surface preparation by conducting a simple test. Gently run your hand across the cleaned hardwood floor surface. It should feel smooth, free from dust, and completely dry. Any remaining moisture or debris could compromise the effectiveness of your subsequent chair mat sliding prevention methods. By investing time in meticulous surface preparation, you create an optimal environment for implementing stable and long-lasting mat solutions that protect both your hardwood floors and office furniture.
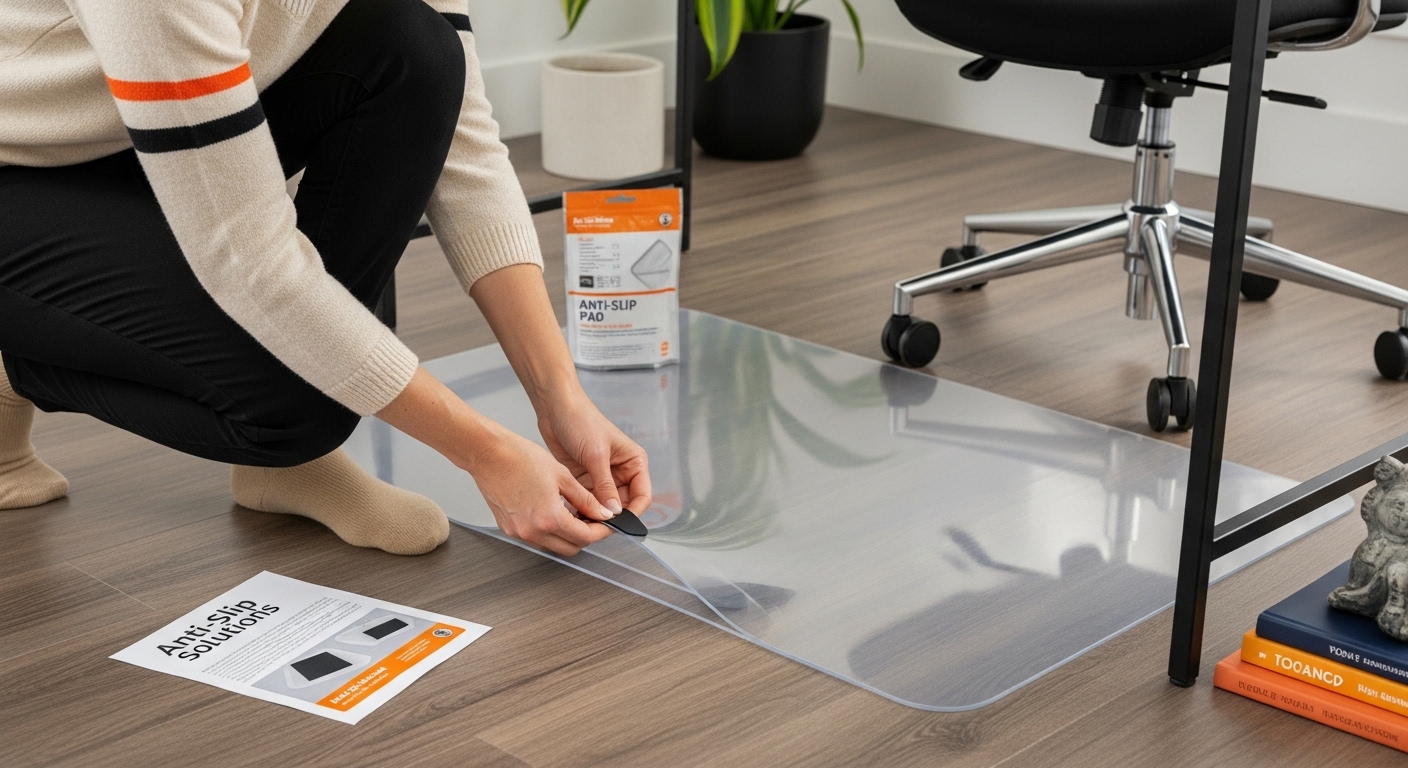
Step 3: Select and Apply Anti-Slip Solutions
Selecting the right anti-slip solution is a critical step in preventing your chair mat from sliding across hardwood floors. Different anti-slip methods offer varying levels of effectiveness, and understanding their unique characteristics will help you choose the most suitable approach for your specific environment.
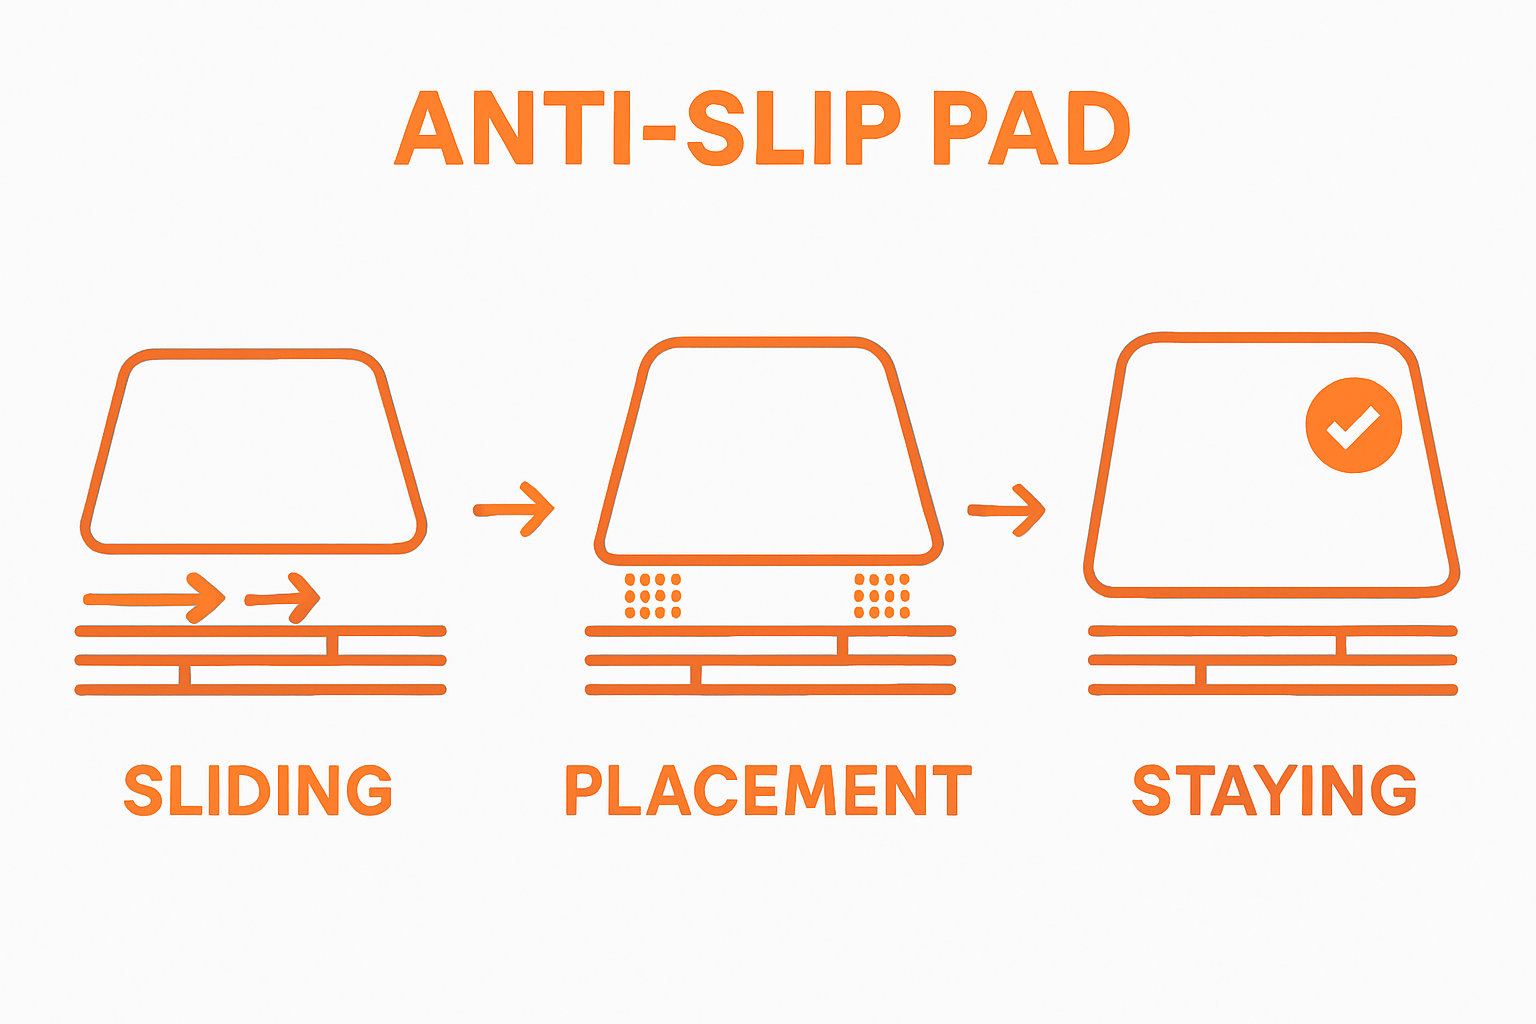
Consider starting with adhesive-backed non-slip mat grips or silicone padding, which are particularly effective for smaller chair mats. These products typically come in thin, transparent sheets that can be strategically placed underneath the mat to create additional friction. When applying these grips, ensure they are cut precisely to match the mat’s dimensions, avoiding any overlap that might create uneven surfaces.
Explore our comprehensive guide on stopping mat slippage to understand the nuanced approaches to preventing mat movement. Alternatively, specialty non-slip mat underlay products designed specifically for hardwood floors can provide a more comprehensive solution. These underlays are typically made from materials like natural rubber or silicone, which grip both the floor and the mat surface without causing damage.
Applying these solutions requires careful attention to detail. Clean the underside of your chair mat thoroughly before installation, removing any dust or debris that might compromise adhesion. For silicone or rubber-based solutions, press firmly and evenly across the entire surface to ensure maximum contact and grip. Some products may require a brief setting period to achieve optimal performance, so follow the manufacturer’s specific instructions carefully.
Your anti-slip solution selection checklist should include:
- Compatibility with hardwood floor surfaces
- Material thickness and grip strength
- Ease of installation and removal
- Potential for floor surface damage
- Long-term durability and performance
Verify the effectiveness of your chosen solution by conducting a simple stability test. Gently push and pull the chair mat to assess its resistance to movement. A successful anti-slip solution will significantly reduce sliding while maintaining a smooth, even surface.
 Remember that some trial and adjustment might be necessary to find the perfect solution for your specific hardwood floor and chair mat combination.
Below is a comparison table outlining various anti-slip solution options for chair mats on hardwood floors, summarising their characteristics and suitability as discussed in the article.
| Anti-Slip Solution | Suitable For | Ease of Installation | Risk of Floor Damage | Notes |
|---|---|---|---|---|
| Adhesive-backed mat grips | Small chair mats | Easy | Low | Cut to fit; offers transparent appearance |
| Silicone padding | Small/medium mats | Easy | Low | Provides friction; cut to size |
| Non-slip rubber underlay | Larger chair mats | Moderate | Very low | Covers full mat; requires careful placement |
| Speciality hardwood underlays | All mat sizes | Moderate | Minimal | Designed for hardwood floor compatibility |
 Patience and careful application are key to achieving a stable, secure mat placement that protects both your flooring and office furniture.
Step 4: Position the Chair Mat Correctly
Precise positioning of your chair mat is fundamental to preventing sliding and protecting your hardwood floors. Proper alignment and placement require more than simply dropping the mat onto the surface. This step demands careful measurement, strategic positioning, and thoughtful consideration of your workspace dynamics.
Begin by measuring the exact area where your office chair moves most frequently. Use a measuring tape to determine the precise dimensions required for your chair mat, ensuring it extends slightly beyond the typical rolling path of your chair. This additional coverage provides a buffer zone that helps distribute weight more evenly and reduces potential sliding risks. Aim to create a mat area that accommodates your chair’s full range of motion while maintaining a clean, professional appearance.
Explore our professional insights on commercial mat placement to understand the nuanced approach to mat positioning. When placing the mat, align its edges parallel to room features like walls, desks, or architectural lines. This creates a visually harmonious setup and helps anchor the mat more securely. Avoid positioning the mat on areas with slight floor irregularities or near heating vents, as these can compromise mat stability.
Carefully lower the mat onto the prepared surface, starting from one edge and gradually smoothing it down. Use gentle, even pressure to eliminate any air pockets or potential wrinkles that might create uneven contact points. Pay special attention to the mat’s corners and edges, ensuring they lie completely flat against the hardwood floor without any curling or lifting that could compromise stability.
Your mat positioning verification checklist should include:
- Mat extends beyond chair rolling path
- Edges are completely flat and smooth
- Alignment with room architectural features
- No visible air pockets or wrinkles
- Consistent contact with floor surface
Verify the mat’s positioning by performing a stability test. Sit in your chair and simulate typical movement patterns. The mat should remain stationary, with no noticeable sliding or shifting. A well-positioned mat will feel secure and integrated with your workspace, providing both functional protection and aesthetic cohesion.
Remember that occasional readjustment might be necessary as floor conditions and mat wear change over time.
Step 5: Test the Stability of the Mat
Testing the stability of your chair mat is the crucial final step in ensuring a secure and safe workspace environment. Systematic and thorough testing will reveal any remaining vulnerabilities in your mat placement strategy, allowing you to make final adjustments that prevent potential sliding or movement.
Begin with a comprehensive movement assessment by sitting in your office chair and performing a series of deliberate motions. Rock gently from side to side, roll backwards and forwards, and rotate your chair to simulate typical workplace movements. Pay close attention to any unexpected shifting or sliding of the mat, which might indicate that previous stabilization methods require further refinement. Listen for any subtle sounds of friction or movement that could signal potential instability.
Understand more about mat performance and maintenance to enhance your understanding of mat stability challenges. During testing, observe the mat’s edges and corners carefully. These areas are most prone to lifting or curling, which can compromise the entire mat’s stability. Press down firmly around the perimeter, checking for any areas that seem less secure or have potential for movement.
A comprehensive stability test involves multiple scenarios and assessments. Apply varying levels of pressure and simulate different working conditions. Stand up and sit down repeatedly, deliberately applying weight at different points on the mat. Observe how the mat responds to sudden movements and weight shifts. Look for any signs of micro-movements or subtle sliding that might not be immediately apparent during gentler testing.
Your mat stability verification checklist should include:
- No visible mat movement during chair rotation
- Consistent contact with hardwood floor surface
- Flat edges without lifting or curling
- Smooth rolling without mat displacement
- Stable performance under varying weight distributions
If you detect any remaining instability, revisit previous steps. Reapply non-slip solutions, adjust positioning, or consider alternative mat materials that might better suit your specific hardwood floor conditions. A perfectly stable chair mat requires patience and potentially multiple adjustment iterations. Remember that environmental factors like temperature, humidity, and floor surface condition can influence mat performance over time, so periodic retesting is recommended to maintain optimal workspace safety and functionality.
Step 6: Maintain and Adjust as Necessary
Maintaining your chair mat’s stability is an ongoing process that requires regular attention and proactive care. Environmental changes, daily wear, and subtle floor surface variations can gradually compromise your mat’s initial positioning and grip, making periodic maintenance crucial for long-term performance.
Establish a routine inspection schedule to assess your chair mat’s condition and performance. Aim to conduct a comprehensive review every three to four months, or more frequently if your workspace experiences high traffic or significant environmental fluctuations. During these inspections, carefully examine the mat’s edges, surface texture, and overall adhesion. Look for signs of wear such as curling corners, surface degradation, or diminishing non-slip properties that might develop over time.
Learn more about maintaining commercial matting solutions to understand the nuanced approach to mat care. Clean the mat and underlying hardwood floor thoroughly during each inspection, removing dust, debris, and any accumulated grime that might interfere with the mat’s stability. Use a soft, lint-free cloth and appropriate cleaning solutions designed for hardwood floors and mat materials to ensure a pristine surface without causing damage.
Temperature and humidity can significantly impact mat performance, particularly in hardwood floor environments. Be prepared to make seasonal adjustments as your workspace experiences different environmental conditions. During periods of high humidity, mats might become slightly more prone to movement, while dry winter months could cause increased friction or potential cracking of non-slip solutions. Regularly reassess and reapply anti-slip methods as needed to maintain optimal stability.
Your ongoing maintenance checklist should include:
- Quarterly comprehensive mat inspections
- Thorough cleaning of mat and floor surfaces
- Assessment of non-slip solution effectiveness
- Evaluation of mat edges and surface integrity
- Adjustment of positioning based on environmental changes
Remember that mat maintenance is not a one-time task but a continuous process of observation and adaptation. Pay attention to subtle changes in your workspace dynamics, such as furniture repositioning, floor surface wear, or changes in chair wheel conditions. By remaining proactive and attentive, you can ensure that your chair mat continues to provide stable, protective coverage for your hardwood floors, preventing potential damage and maintaining a professional, safe workspace environment.
This checklist summarises the key verification points to ensure your chair mat is stable and well-maintained, as recommended throughout the article.
| Checklist Item | Purpose |
|---|---|
| No visible mat movement during chair rotation | Confirms mat remains stationary |
| Consistent contact with hardwood floor surface | Ensures full grip and stability |
| Flat edges without lifting or curling | Prevents trips and uneven wear |
| Smooth rolling without mat displacement | Maintains functionality and efficiency |
| Stable performance under varying weight loads | Withstands everyday office use |
| Quarterly comprehensive mat inspections | Detects early signs of instability |
| Routine cleaning of mat and floor | Sustains grip and prolongs mat lifespan |
Transform Your Hardwood Workspace with Custom Mats Built to Stay in Place
Tired of fighting with a chair mat that constantly slips or damages your beautiful hardwood flooring? Our article has outlined the vital steps for assessing your chair mat, preparing your floors, and testing anti-slip solutions. But if you are still frustrated by instability or want a guaranteed fix, Mats4U offers specialist mats and custom solutions that truly keep your workspace secure and flawless.

Experience the difference that a purpose-built chair mat can make. Browse Mats4U for made-to-measure, anti-slip mats, and discover products tailored to your exact flooring and professional environment. Protect your investment and keep your focus where it belongs. Act today and upgrade your office setup with the confidence that comes from a trusted flooring expert. Explore real solutions and order now at Mats4U for a workspace that works as hard as you do.
Frequently Asked Questions
How can I evaluate my chair mat and hardwood flooring?
Begin by examining the surface condition and finish of your hardwood floor, and inspect the material composition and backing of your chair mat. Look for any signs of wear or surface texture that may affect mat adhesion.
What cleaning method should I use before applying anti-slip solutions?
Remove all furniture, dust the floor with a microfibre mop, and use a pH-neutral hardwood floor cleaner, applying it with a damp cloth in the direction of the wood grain. Ensure the surface is thoroughly dried before applying any anti-slip solutions.
What are the best anti-slip solutions for chair mats on hardwood floors?
Adhesive-backed non-slip mat grips and silicone padding are good options for smaller mats, while specialty non-slip mat underlay products designed for hardwood floors can provide comprehensive grip without damaging the surface.
How do I test the stability of my chair mat after positioning it?
Sit in your office chair and perform gentle movements, such as side-to-side rocking or rolling. Check for any sliding or shifting of the mat. A stable mat should remain stationary without lifting or curling at the edges.


